I’ve spent most of my spare time in the last two weeks playing around with my new favourite toy – The Anet A8.
The Anet A8 is a 3D Printer kit, an Prusa i3 clone to be exact. It’s made up of the cheapest components possible, and as a result comes with a rock bottom price tag, making it very attractive to those looking to get their feet wet with 3D printing.
I paid about $250AUD for mine, and that was just before Christmas 2016, so it’s probably even cheaper now. At the time it was cheapest on Gearbest, so that’s where I got mine, but you could check out Aliexpress, or even Ebay – which might feel a bit safer if Chinese dropshippers aren’t your bag.
In spite of the cheap parts (and a few well documented failure points) the A8 has a reputation for putting out high quality prints when properly configured, and it also has a thriving community around it helping out noobs and pros alike with troubleshooting, settings and improvements.
The Anet A8 arrived a week late, a cocoon of yellow tape containing a box of Styrofoam crammed with electronics, motors, wires, rods, screws and a wobbly acrylic frame. This is a kit printer, so you have to put it together yourself – so that’s what I spent the first few evenings of 2017 doing.
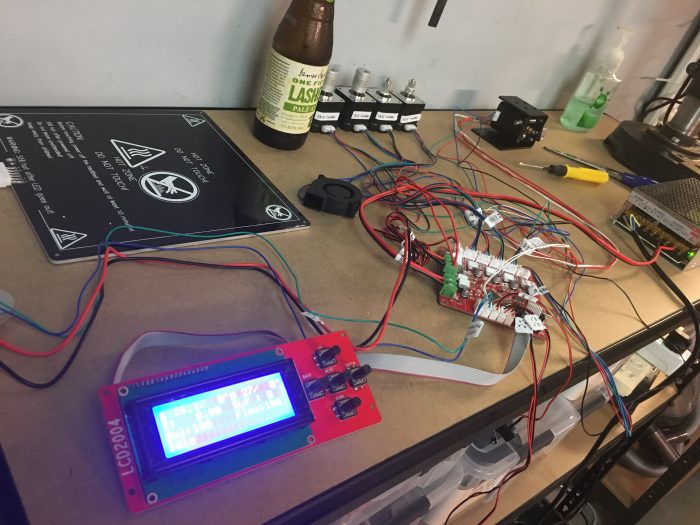
There’s no printed manual, but there is an SD card included with PDF instructions and information and some starter models to print (this SD card later becomes your method of loading GCODE onto the printer) but the best way to put the thing together is to methodically follow along with the eerily silent YouTube videos posted on the company’s channel. The videos feature a faceless employee who screws the thing together while you frantically pause and rewind to read the English captions that display vital information on screen for approximately one millionth of a second each time.
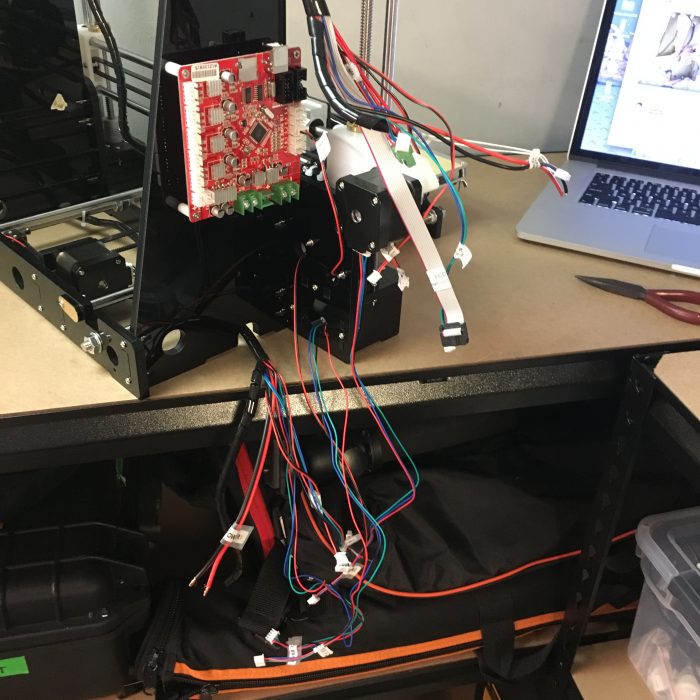
It takes several hours to build, and once it’s all together it certainly looks impressive… just don’t lean on it or anything. You see, the main difference between this printer and one many times the price is the frame material – this is creaky acrylic, not machined aluminium or steel. Beggars can’t be choosers though, so you take a moment to bask in your handiwork, and then it’s time hold your breath and plug the thing in.
Once up and running, and with all the electronics checked and debugged (again by following along to a YouTube video, this one narrated in accented English with lilting guitar music in the background) after nervously observing the woefully cheap power supply with its hand wired cord for signs of explosive meltdown, I decided to throw caution to the wind yet again and just try to print one of the pre-prepared files on the SD card.
I levelled the heat bed with a sheet of paper as per the instructions, fed the extruder one end of the small sample spool of PLA that came in the box, selected the first file on the list, and hit ‘print’.
To my complete astonishment, it fucking WORKED.
Not only did it work, it worked really, really well! Obviously as you can see, the print didn’t finish – Just my luck, I randomly chose the largest object in the test print folder – and there just wasn’t enough filament in the sample roll to finish it, but the level of detail and resolution are really quite impressive.
Now all that’s left to do is play the waiting game while some rolls of PLA are delivered, and then it’s time to start printing upgrades.
One of the coolest things about this printer is the ability print out parts that actually improve the durability of the machine and the quality of the results it produces. The community built around this particular model is gung ho about designing and implementing new parts and upgrades to reinforce the frame, improve the cooling and bed levelling, and fix or enhance just about every other aspect of the printer.
You too can get a glimpse into the fate of humanity and our future machine overlords as this seemingly benign piece of technology uses you as an agent to improve itself, as you find yourself up at 1am printing new and improved fan shrouds, mesmerised watching layer after layer of your own doom lay down on blue masking tape…
While I’ve had a great experience thus far with mine, it hasn’t all been roses in the short but eventful life-so-far of the Anet A8, and this should be pointed out at the outset to anyone looking to try their luck with this machine. Tales are rife throughout the community of cracked frames, burnt out boards, and even parts catching on fire. Remember, these are cheaply made components straight from Shenzhen where the QA is light-to-non-existent, that you’ve whacked together in your garage while squinting at a Youtube video, and then happily plugged into the wall and run 240 volts into. That’s a lot of possible failure points.
Luckily though, just as prevalent are clever and resourceful owners coming up with fixes and DIY solutions to these problems, including adding cheap, easily sourced MOSFETs to the heat bed to stop boards and connectors from frying, adding fused switches and safety covers to the terrifyingly exposed power terminals on the power supply, and replacing boards, motors, belts, frame pieces, and just about everything else with higher quality parts should yours fail, or you just feel like upgrading.
Time will tell how well this printer can stand up to regular use, upgrades or no. For now, it’s running like a dream. Every hiccup I’ve encountered has been solvable with a small amount of googling or scrolling through the community facebook page, and fixing each issue has been a small lesson the minutiae of 3D printing tech.
This humble printer has captured the hearts of a huge community of Makers, from first timers to old pro 3D printer enthusiasts. For those with the time and the patience to build, maintain and upgrade this cheap and cheerful device it represents a perfect entry into the world of 3D printing – along with a crash course in the fundamentals of the hobby that probably won’t get with a more expensive or pre-built device.
I’ll keep writing about my adventures with this machine in the coming weeks, so stay tuned.